
Install and use ATLAS.ti on multiple devices
Key takeaways
- You can always install ATLAS.ti Windows and Mac on multiple devices from my.atlasti.com
- The installer is only available if you have an active Desktop license
- ATLAS.ti licenses are not tied to a single computer
- You can sign in and use the software on any number of devices
- Desktop projects are stored locally on your computer
- You must export and import projects when switching devices
- You do not need to install any software to use ATLAS.ti Web
- You simply log in at web.atlasti.com
- The number of devices that can be used at the same time depends on your license seats
- Each time ATLAS.ti is opened, one seat is occupied

Who this article is for
Anyone who wants to install ATLAS.ti on multiple devices, work across different computers, or understand how licenses and projects behave when switching devices.
How to install ATLAS.ti Windows or Mac
You can always download and install ATLAS.ti from your account page:
- Go to https://my.atlasti.com
- Sign in with your ATLAS.ti account
- Under licence management, locate "ATLAS.ti Windows" or "ATLAS.ti Mac" and click to download the applications.

- ATLAS.ti Web is a browser-based application that does not require installation. To access it visit web.atlasti.com or click ‘Open ATLAS.ti Web’ from my.atlasti.com.
How to use ATLAS.ti across multiple devices
- As your license is associated with your ATLAS.ti account, it is not necessary to change it, just log out/in.
- ATLAS.ti Desktop projects are always only saved on the local computer, so your projects will not automatically sync across your computers. To move your project to another computer, you just need to export-import your project
Step 1 – Export the project
- ATLAS.ti Windows
- Open your project
- Go to File > Export > Project Bundle
- Choose a location to save the file
- Click Save
- This creates a .atlasti file that contains your project data.

- ATLAS.ti Mac
- Open your project
- Go to Project > Export > Project
- Choose where to save the file
- Click Export

Step 2 – Log out from your current ATLAS.ti
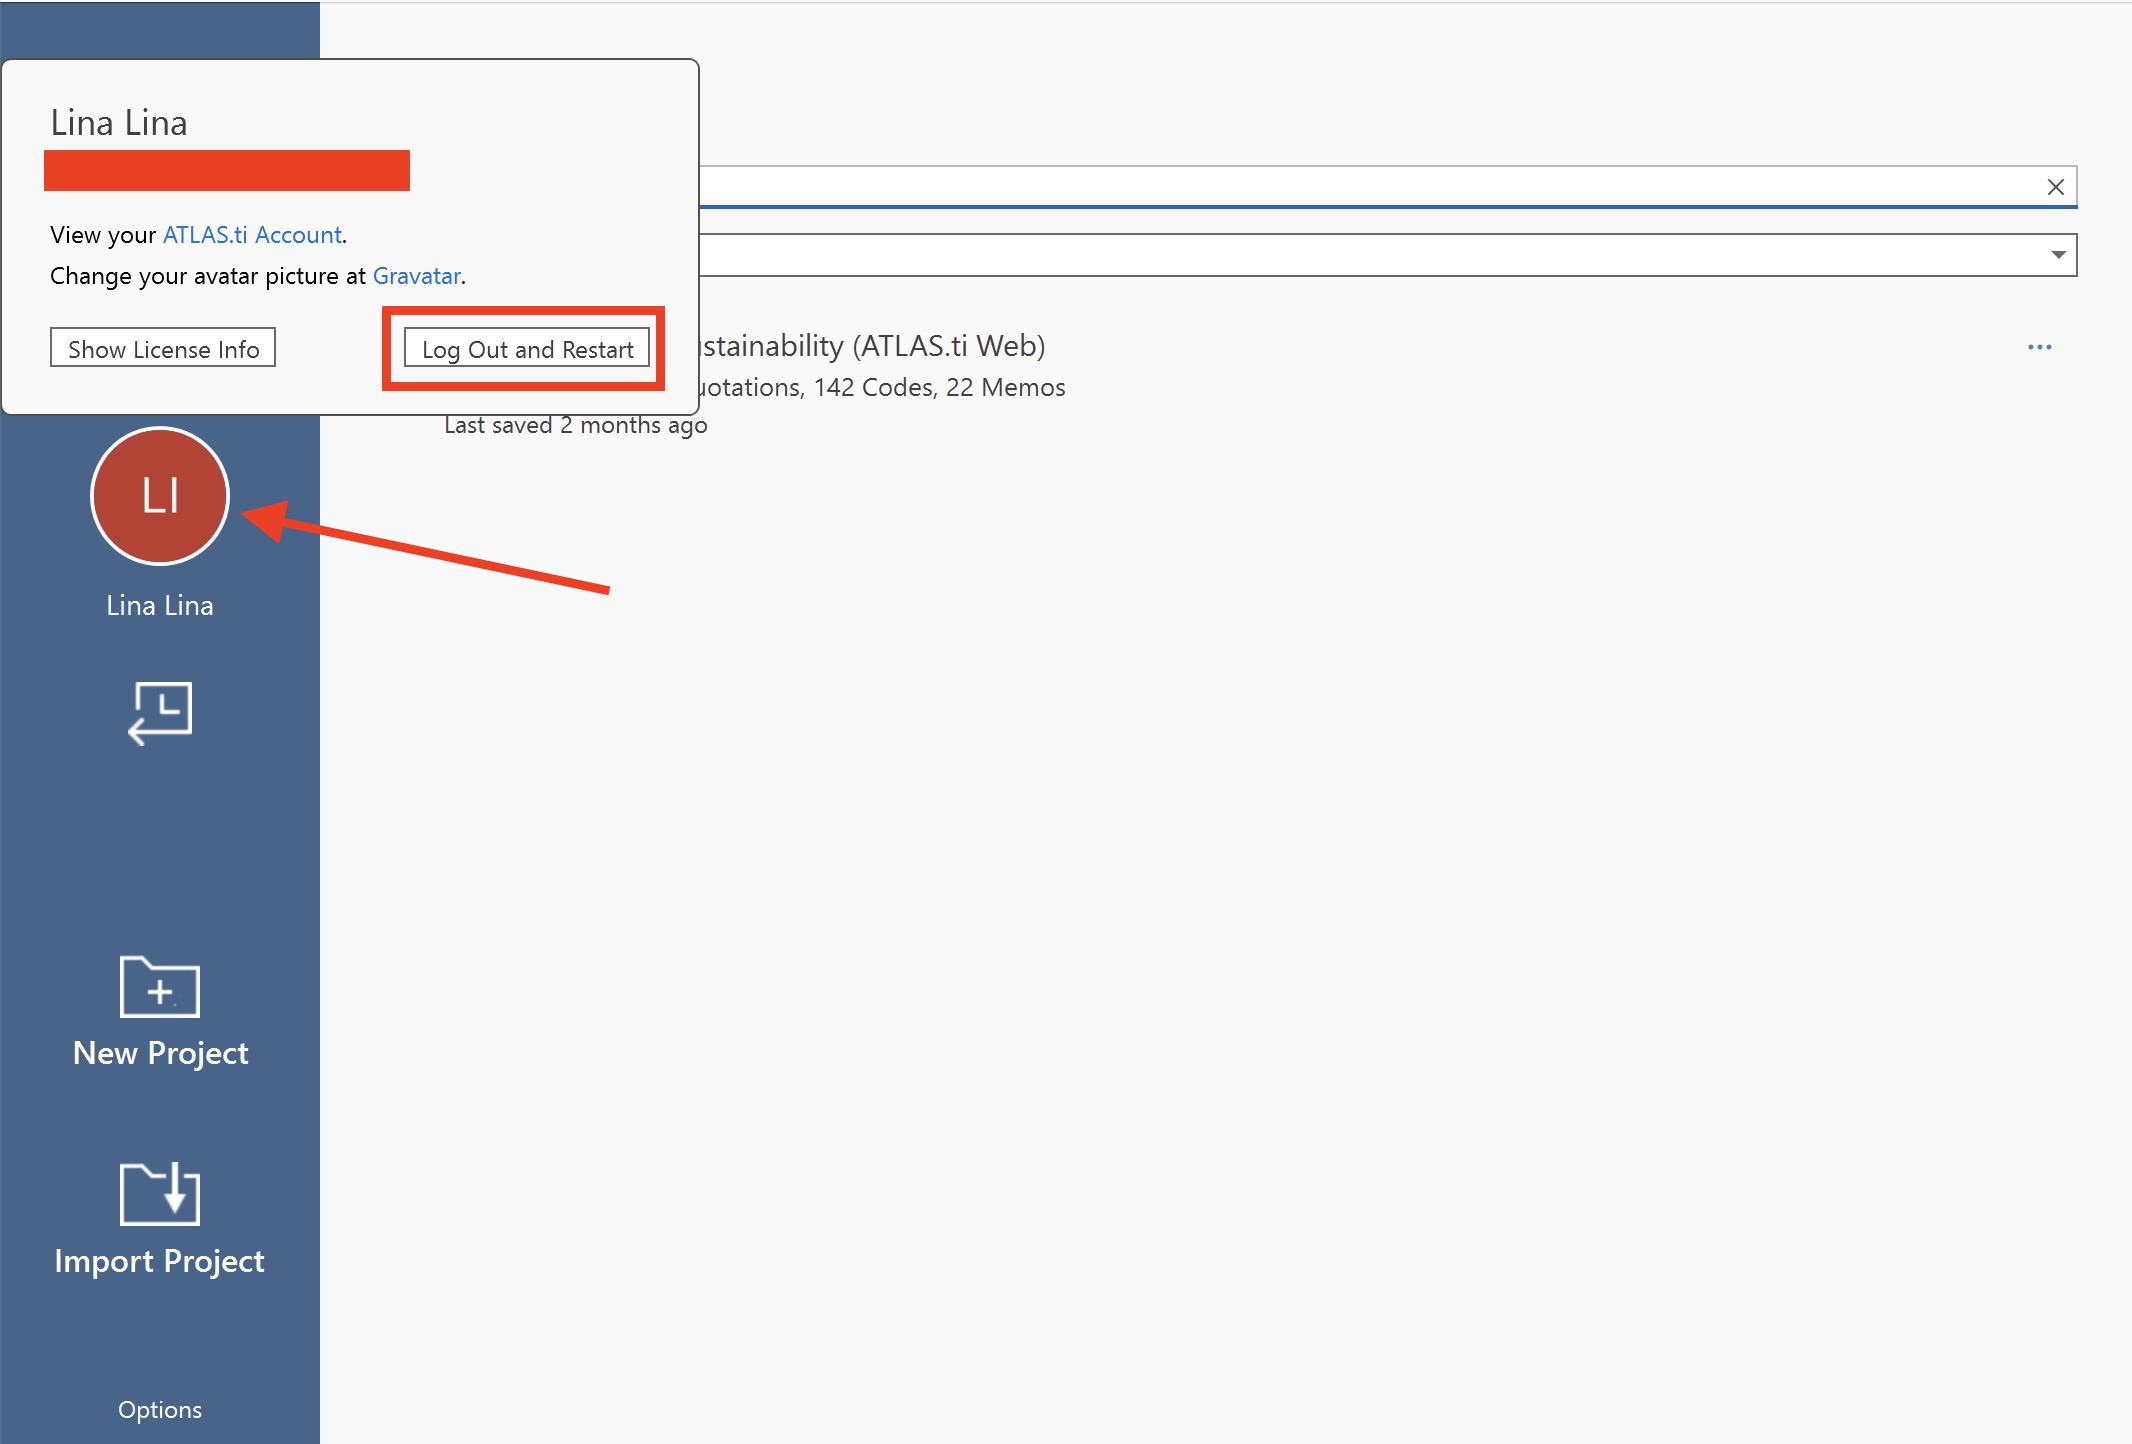
- ATLAS.ti Windows
- Go to the welcome screen
- Click your avatar/initial
- Click "Log Out and Restart"
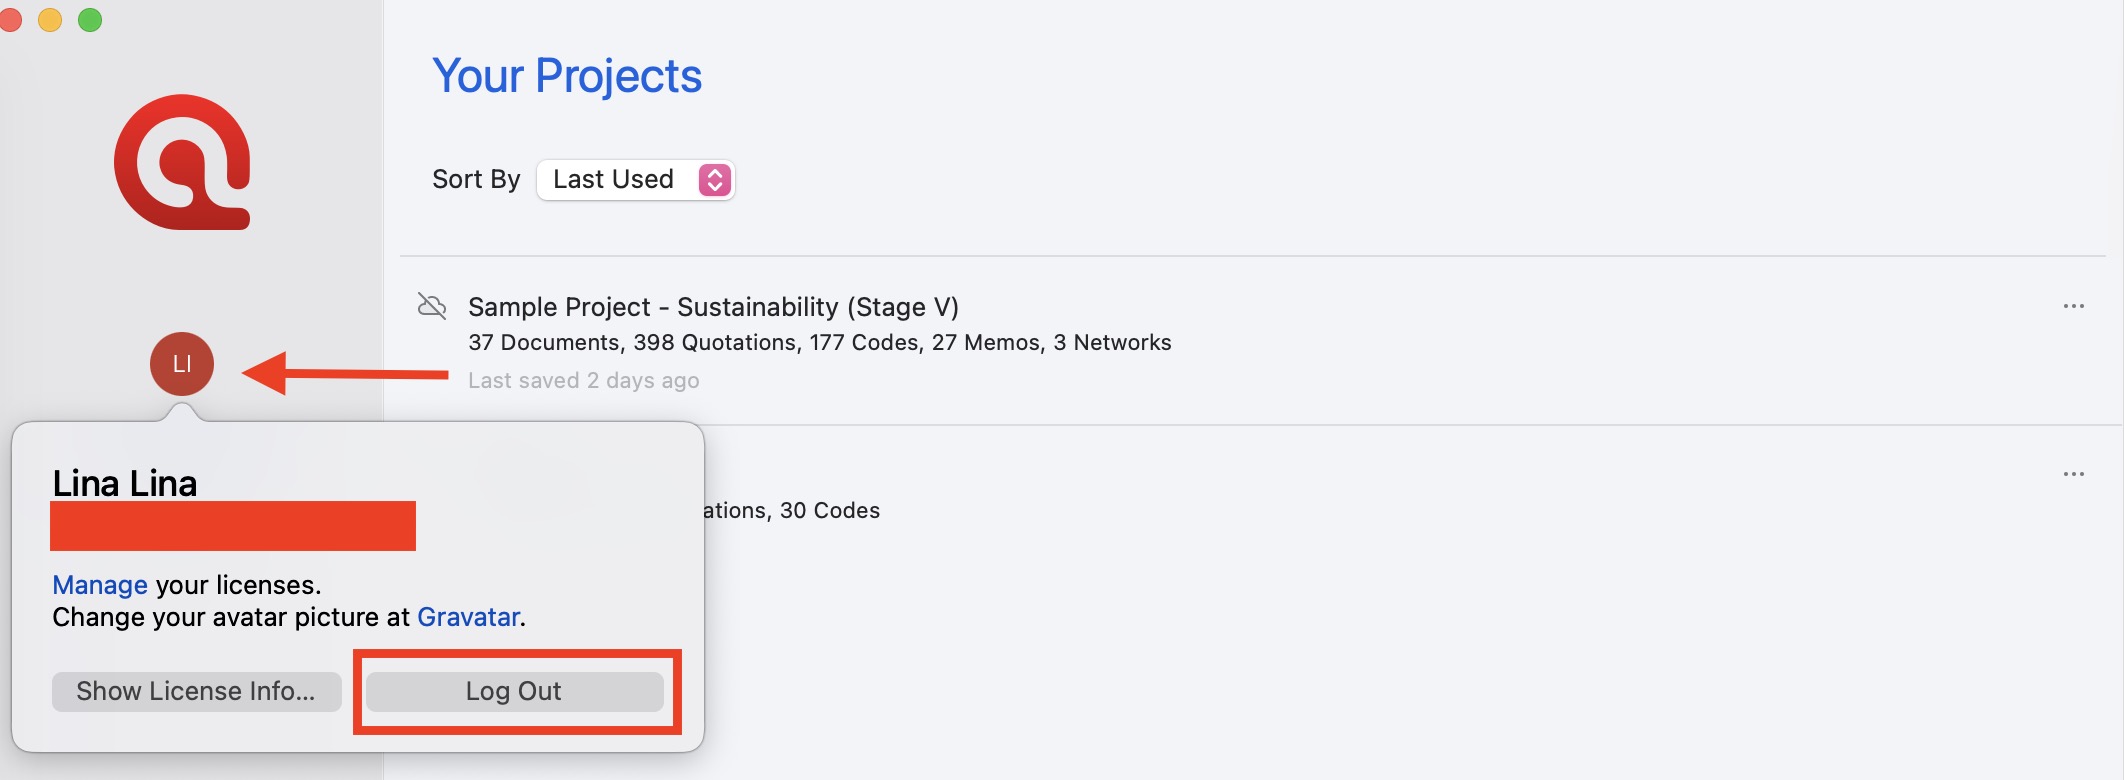
- ATLAS.ti Mac
- Go to the start screen
- Click your avatar/initial
- Click "Log Out"
Step 3 – Download ATLAS.ti from my.atlasti.com and install it on the second computer
You can check these video tutorials:
- ATLAS.ti Windows: https://youtu.be/vz-FlfDQQEk?si=XTlGSbg5Vp71eQpA
- ATLAS.ti Mac: https://youtu.be/rDgmtcHUqXQ?si=1WMo0CseTBJlEbbG
Step 4 – Log in with your ATLAS.ti account and Import the project
- ATLAS.ti Windows
- Open ATLAS.ti
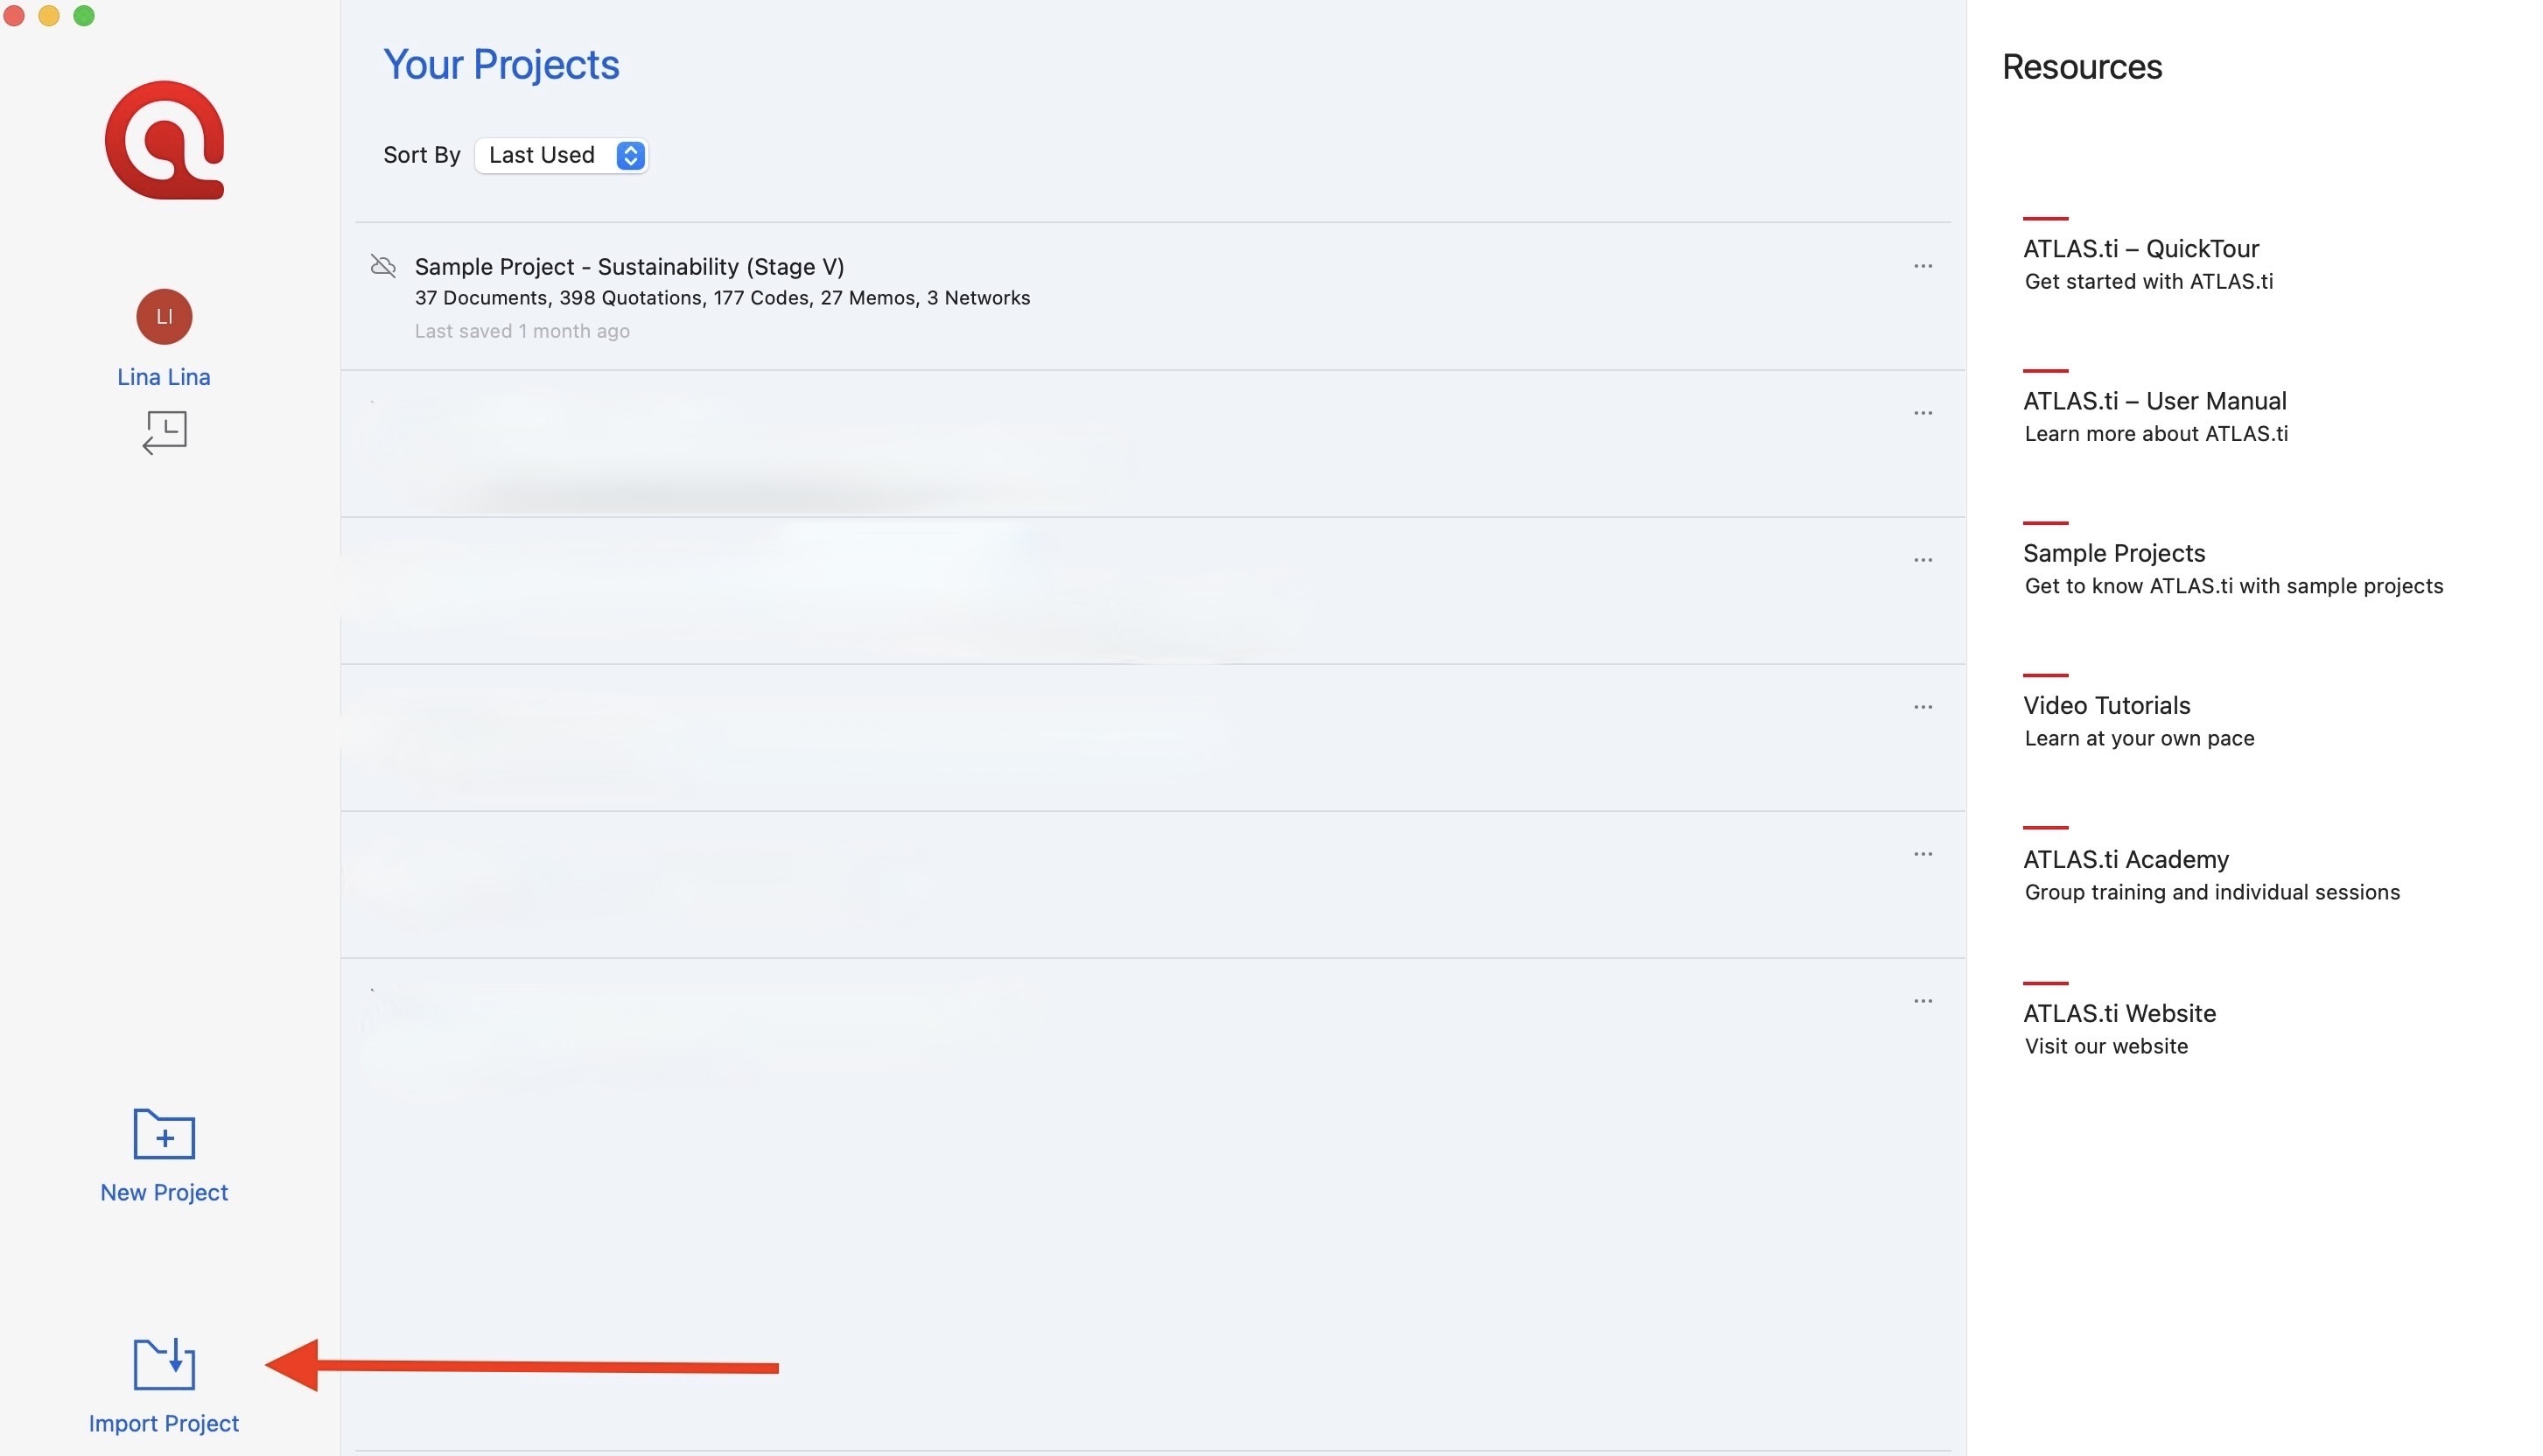
- On welcome screen click "Import Project"

- Or from inside an existing project, go to File > New > Import Project

- Select your exported project file
- Follow the prompts to complete the import
- ATLAS.ti Mac
- Open ATLAS.ti
- On start screen click "Import Project"
- Or from an existing Project, Go to Project > Import Project

- Select your project bundle file
- Complete the import process
Common issues and mistakes
- Unable to log in on a new computer
- Make sure you have properly logged out from ATLAS.ti on your previous device. You can also free up a seat by using the “Free up my seats” option in my.atlasti.com.
- My project is not visible on another device
- ATLAS.ti Desktop projects are stored locally on your computer. You must export and import the project to access it on another device.
- I moved files but cannot open the project
- Ensure you are importing a project bundle file (.atlasti).
When to contact support
Contact ATLAS.ti Support if:
- You cannot install ATLAS.ti
- You cannot log in
- You cannot import a project bundle
- A project fails to open after import
- You encounter errors during export or import
- A license seat appears to remain occupied after closing the application or using the “Free up my seats” option from My ATLAS.ti
When contacting support, please include:
- The email address associated with your ATLAS.ti account
- Your ATLAS.ti version (Windows or Mac)
- A description of the issue
- Screenshots or error messages, if available