
How to create your project in ATLAS.ti
Key takeaways
- Every analysis in ATLAS.ti starts with a project.
- You can create a new project in ATLAS.ti Windows, Mac, or Web in just a few clicks.
- Existing projects can also be imported from desktop or web versions.
- Sample projects are available if you want to explore how a completed project is structured.
Who this article is for
This article is for new ATLAS.ti users who want to create their first project or import an existing one.
Create a new project in ATLAS.ti Windows
If you just opened ATLAS.ti:
- Open ATLAS.ti Windows.
-
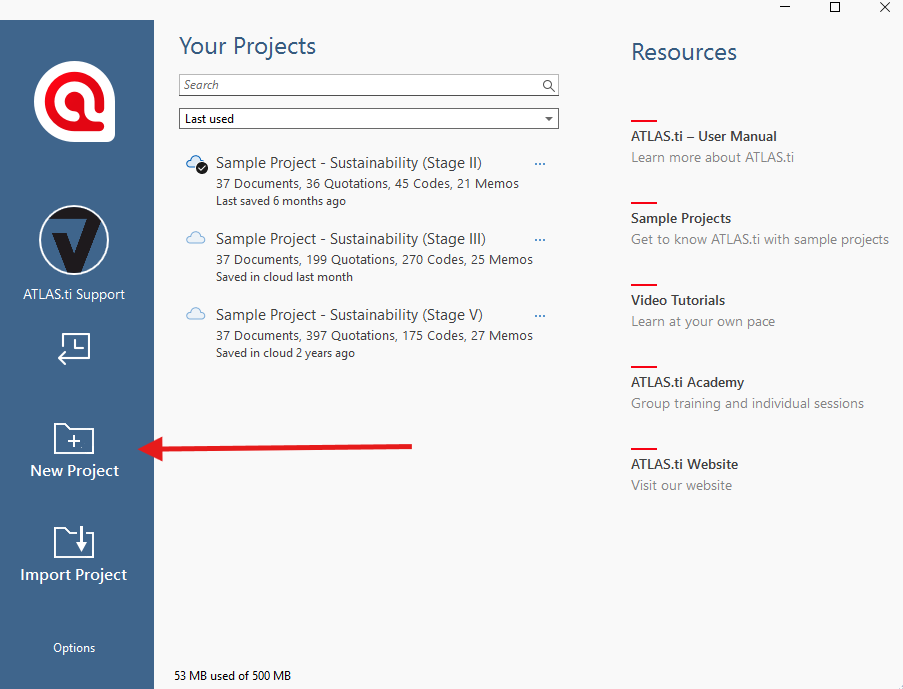
On the left side of the opening screen, click New Project.
- Enter a project name.
- Optionally add a project comment.
- Click Create.

If a project is already open:
- Click File > New.
- In the backdrop screen, select Create New Project.
- Enter a project name.
- Optionally add a comment.
- Click Create.
Create a new project in ATLAS.ti Mac
If you just opened ATLAS.ti:
- Open ATLAS.ti Mac.
-
On the left side of the opening screen, click New Project.

- Enter a project name.
- Click Create.

If a project is already open:
- From the main menu, select Project > New.
- Enter a project name.
- Click Create.
Create a new project in ATLAS.ti Web
-
Go to the Projects page in ATLAS.ti Web:
-
Click Add Project.
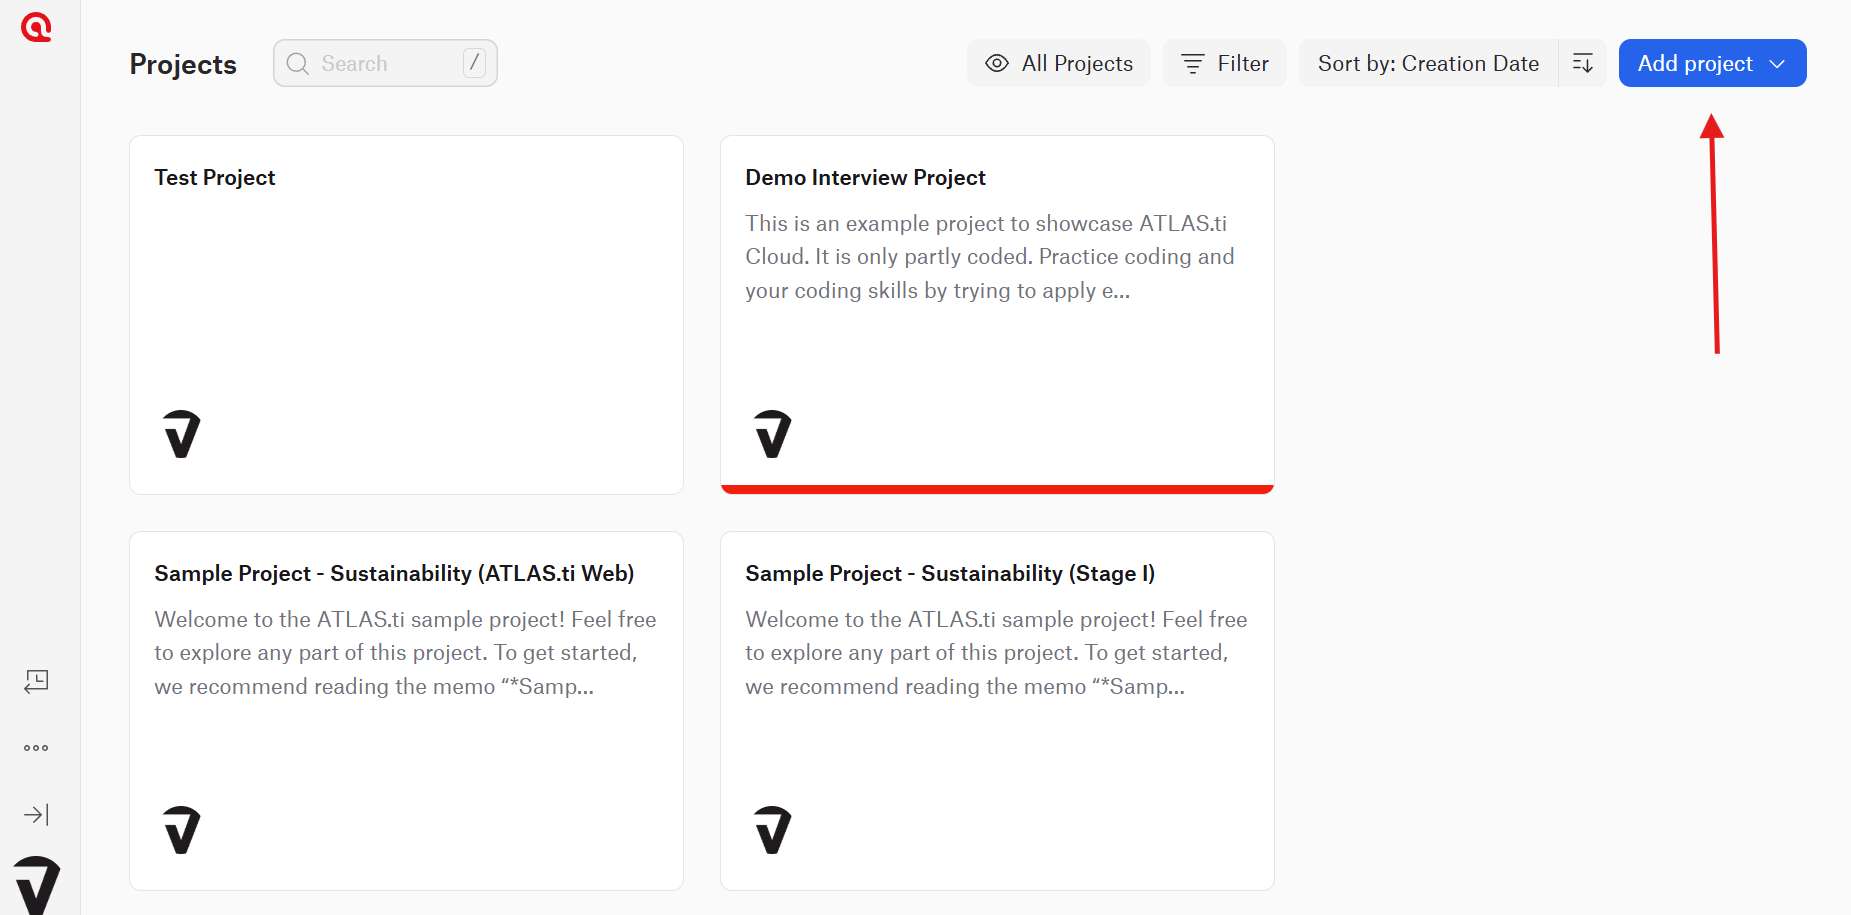
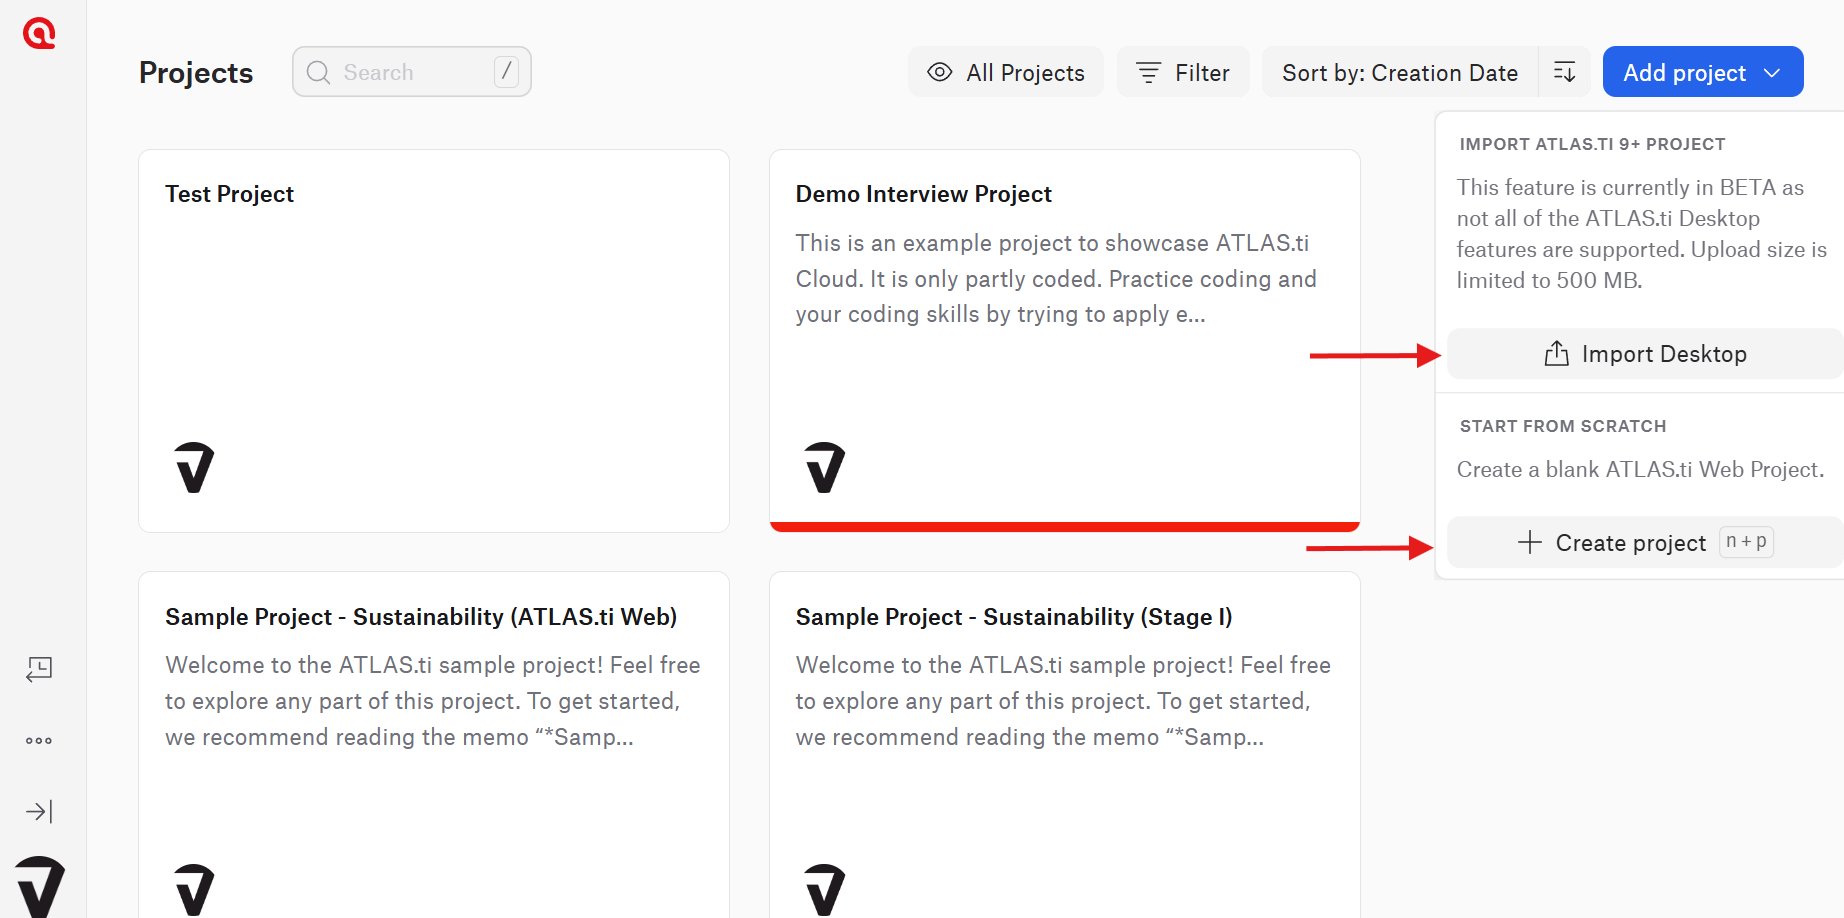
- Select one of the following options:
- Create Project to start a new project
-
Import Desktop to import an existing desktop project
- Start adding documents and working in your project.


ATLAS.ti Web supports importing desktop project formats such as .atlasti and older .atlproj files.
Import an existing project
On all platforms, you can import existing ATLAS.ti projects instead of creating a new one.
Windows and Mac
- Open ATLAS.ti.
- On the opening screen, select Import Project.
- Choose the project file from your computer.
- Follow the prompts to complete the import.
You can import projects created in other ATLAS.ti desktop versions, including projects shared by colleagues or downloaded sample projects.
ATLAS.ti Web
Use the Import Desktop option when creating a project to upload a desktop project into ATLAS.ti Web.
Explore sample projects
If you are new to ATLAS.ti, sample projects are a useful way to see how projects are organized and how coding and analysis work in practice.
You can use these projects for:
- Learning how ATLAS.ti works
- Teaching ATLAS.ti to others
- Exploring example workflows and coding structures
Common issues and mistakes
- Importing unsupported files
- Make sure you are importing ATLAS.ti project files such as
.atlastior.atlproj, not regular documents like Word or PDF files.
- Make sure you are importing ATLAS.ti project files such as
- Forgetting where projects are saved
- Projects are stored locally unless you are using ATLAS.ti Web or Project Cloud features. You can open any project from the ATLAS.ti software. Keep backups of important work by exporting your project, and you can save exported project files anywhere on your computer, in an external hard drive, online cloud storage, etc.
- Creating duplicate projects accidentally
- If you import the same project multiple times, you may end up with duplicate copies with similar names. Rename imported projects clearly.
When to contact support
Contact support if:
- A project will not open or import
- You receive an error during project creation
- Your imported project appears incomplete
- ATLAS.ti Web does not recognize your desktop project file